Clean Installation of Windows Operating System
June 10, 2024
Tyler Villaroman
Verifying System Requirements
Before proceeding with a clean installation of Windows, it's crucial to verify that your computer meets the minimum system requirements for the desired version of Windows. This includes checking compatibility with your hardware components such as processor, RAM, and storage space.
Using the Media Creation Tool
The Media Creation Tool is a versatile utility provided by Microsoft that allows users to create installation media for Windows. Additionally, it offers the option to perform a clean installation directly from the tool. Here's how to use it:
1. Downloading and Using Media Creation Tool
Go to the Windows10 or Windows11 Installation Assistant. For this example we will be using Windows 10.
- NOTE for Windows 11: Before installing, please refer to the PC Health Check app to confirm your device meets the minimum system requirements for Windows 11 and check the Windows release information status for known issues that may affect your device. Directions for this can be found here: Windows PC Health Check
1. Click on the "Download Now" button under Create Windows Installation Media

2. Once downloaded, please run the MediaCreationTool.exe file. When prompted with "Do you want to allow the following program to make changes to this computer?" Select Yes

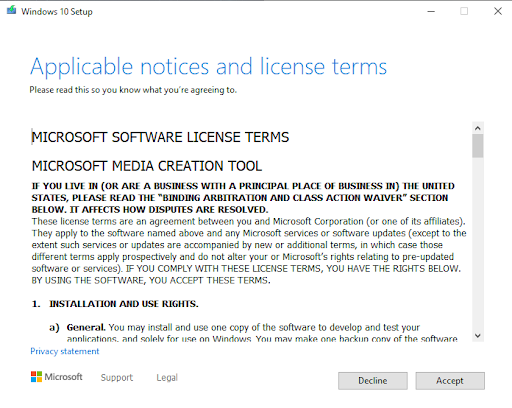
3. Once open it will prompt with "Getting a few things ready and will proceed to "Applicable notices and Licensing terms" page. Select Accept


4. Select Create installation media (USB flash drive, DVD, or ISO file) for another PC and select Next

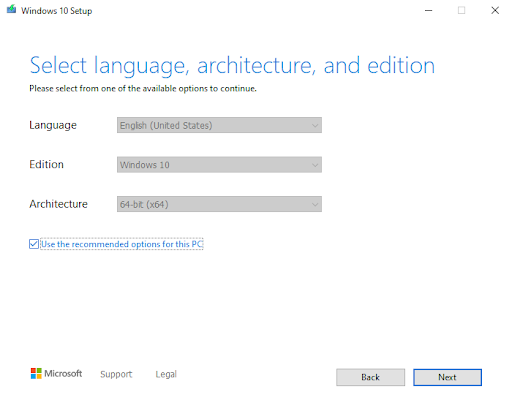
5. You will be prompted to select the language, edition, and architecture. The creation tool will default to properties of the system it's being run on. You can uncheck the "Use the recommend options for this PC" and be able to make any changes, if needed.

6. Next will prompt you with the version of a media you would like to create. Once the preferred option is selected click Next. If selected to create an ISO File for a DVD, you will have to select where you want that file to be saved.
- Note for Flash Drive Option: For the USB flash drive option it has to have a minimum capacity of 8 GBs and this will reformat the flash drive and Erase any existing data on it.
For this example we will be selecting the USB flash drive option.

- Suggested to just have that one flash drive plugged into the PC to avoid any accidents and losing any important data.

8. The program will progress through a few automated steps and will let you know when completed.


2. Setting Boot Priority
Once completed you will be able to safely remove the media created to be used on the intended system to begin the clean installation. The media should be inserted into that computer prior to starting the computer. If you encounter where the computer seems to not start the installation on start up you may need to adjust your boot priority. To do so please see Setting Boot Priority
3. Installing New Windows Operating System
1. Select your language, time, and keyboard method and click Next:

2. Click Install Now

3. Windows 10 setup will prompt you for a product key during installation a couple times. If you originally upgraded from Windows 7 or Windows 8/8.1 click the option 'I don't have a key' and 'Do this later' . If you have a Windows 10 product key, you can proceed to enter it.

4. Accept the license terms then click Next

5. Click Custom: install Windows only (advanced)

6. Select the unallocated drive listed, click New, Click Apply and then OK.

7. Wait while Windows installs. When this phase is complete, Windows will automatically restart then reboot into setup again. Afterwards, Windows will detect and instal your hardware, and will restart one last time.
Trust Our Expertise
With years of experience in the software industry, we understand the nuances of Windows installation and optimization. Whether you need guidance on system requirements, assistance with the installation process, or advice on optimizing your Windows environment, we're here to help.